“Wait, BTD 3.5?! WHA?!” you might be asking from looking at the title.
Yes. 3.5, as this resurrection project to bring back a fan favorite with some of my furry friends, using the new 1.2b Dutchie model. I am also doing the Blender editing
myself (yes, I’m actually doing it). I learned how to remove parts of the model! 😀
I mean, since we’re stuck in isolation for God knows how long until this virus stops spreading (even though this is normal for me.. well minus having to get food delivered on the weekend instead of walking), I might as well learn something new.
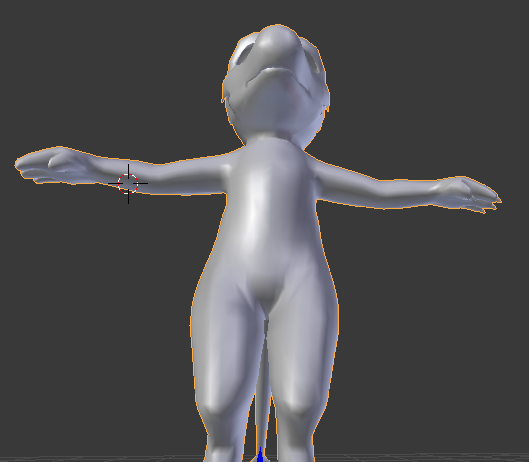
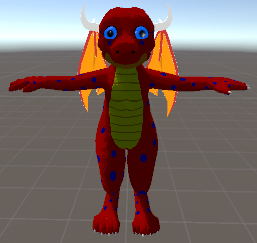
Here’s my current work (heavily WIP and in Alpha of course);
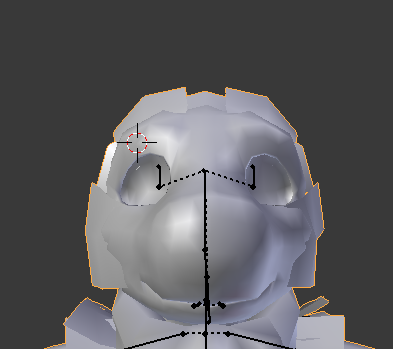
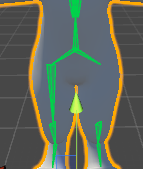
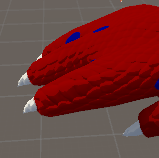
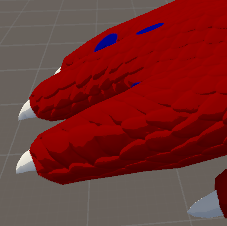
As you can see, the horns/ears/wings have been removed (and so are their bones). I’ll be removing the chest and back fluff soon, and the tail fluff. I can see now why it took so long to do before, as there are a lot of faces to remove.
The next challenge is to actually add a model to another model (horns/elbow claws/back spikes), but I feel (hopefully) confident I’ll find out how to do that. My BTD wings, I’ll do that in Unity as they’re a headache to rig.
–
So why am I doing this now? It’s something I discovered with the old model, in a .. very interesting way of finding out. Laying down on a bed while Jero was.. well, you know, I noticed the lighting was really bad on the model. It was horribly bad. The sex sure wasn’t though. 😉
So yeah, that is hilariously why I’m doing this. Because the 4.0 is.. too THICC for that activity. lol
—
I will be posting updates as work continues on the model. 🙂
==========================================
DAY 2 (learned how to hide the armature by the way);
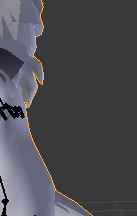
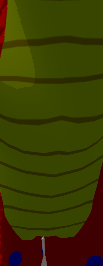
Head/neck & back/shoulder fluff has been removed. Though I had a bit of an issue removing the neck fluff..

Thankfully the nice folks in the Blender Discord were able to help me by going into Edge mode and hitting ‘F’.
I also learned how to remove the ‘beans’, thanks once again to the Blender Discord!
And that’s not all I learned; two new kinds of mass select hotkeys.
–
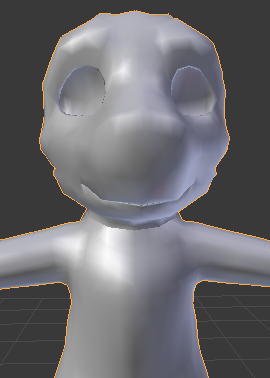
Aaaaand.. DONE! Done removing the floof, that is.

Removing the tail floof was a bit tricky, as it blended well into the tail itself. Thankful for an undo option.
Now I could take this time to redesign the ‘waffle tail’ at the end to be more straight. But I might do that at a later time.
And thanks to Wolves, I ‘learned’ (more like struggled in trying to learn what hotkeys to hit and when) how to add my horns to the model, but how to make my own. You gotta weight paint them to have them part of the model, which is easy. Probably will have to do that for the back spikes and the elbow claws.
Taking a break, and will likely be asking Wolves again (and writing down what he tells me to do). If he can, I’ll make new elbow claws and spikes.
=======================================
DAY 3 (thanks to Wolves’ teaching, the model is nearly ready for the Beta stage);
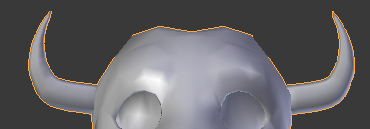
The horns/elbow claws/back spikes have been added to the model. As usual, it was annoying with him being sarcastic and making fun of me at times. But if it wasn’t for his timely help, this project would’ve been delayed for a very long time.
Wolves also taught me how to make a triangle in less than a minute (to replace the old one).
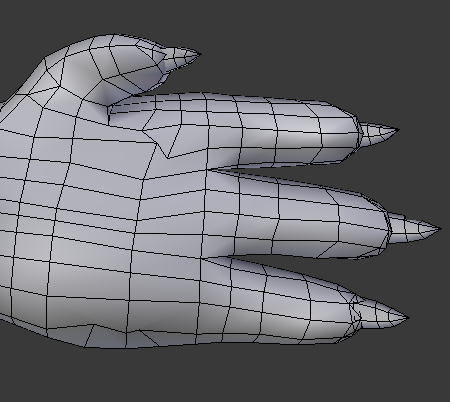
But anyway, yeah! All I need to do now is remove the beans from the feet (forgot about that, DERP!!)
There, don– wait. Why’s the right foot missing its claws?? Asked Wolves and followed his direction, but applying the Mirror modifier gives me an error: “Modifier cannot be applied to a mesh with shape keys.”
And that’s now fixed. Turns out since the claws (even when detached from the model), the shape keys are still part of it and had to be removed to properly apply the modifier.
========================
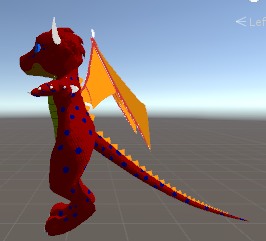
DAY 4 (final touches);
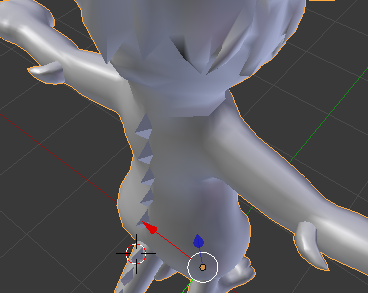
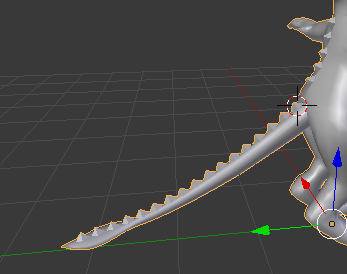
I’m cleaning up the back/tail spikes by resizing them (and adding more). Also you might notice something’s different with the tail now.
I got rid of the diamond part of the tail (that’s typical with Dutchie tails), and made it pointier (with help from Wolves)! It was a simple resize thing, but had a few parts that I possibly would not be able to recreate without writing them down.
Blender has a LOT of “do this but make sure you do X before, but not before doing Y!” that makes my head spin.
For example, when it comes to attaching an object to a bone, there are so. many. STEPS!!
Go to Object Mode, select bone which takes you to Pose Mode, then you gotta right click to go back to Object Mode, then you go to Weight Paint, then you go back to Edit Mode just to set the fucking object to the bone! Holy fuck, Blender.
But anyway, I got what I needed done and the model is pretty much ready for the Beta state (Unity). I need a break from this. Blender is just so freakin’ infuriating at
times (when you’re trying so hard to learn it).
========================
DAY ??? (what time is it?)
“Oh, it’s you folks. It’s been a long time! How have you been? I’ve been reeeeeaallly busy putting this project on hiatus!”
I’m still alive, yes. I’ve been putting this project on hold for a very, very long time. But now it’s time to stop that and get back to work, especially when I wrote down a list for myself on moving the project into Beta. However… I felt what I had done was “too easy”, too simple– something was going to go wrong.
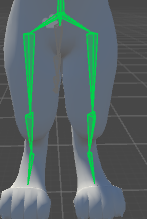
Sure enough, I was right. The model had no ‘Armature’ listed in the Hierarchy. The Armature is important, as it fuses the bones to work within the mesh (aka to make the model move). In other words, the model had no muscles. The bones moved, but without muscles, the body won’t move with the bones.
I also noticed this issue when I was looking for answers;
Missing left leg bone. Not good. Attempting to fix caused these errors;
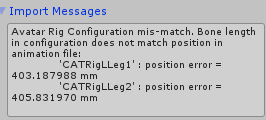
I was forced to ask Kaelygon (since he made the model). After awhile, I discovered the issue with the missing leg bone. It was using CATRigLLeg1.001, instead of CATRigLLeg1.
–
Correcting this mistake (possibly caused by the export), the invisible bone issue is now fixed!
–
As for the ‘muscles’ not doing anything, it turned out there’s a export bug with 2.79b. I noticed this (from this);

Notice the word ‘Armature’ isn’t listed. Kael asked for the blend file and I sent him. He exported it using 2.8, and it worked (proving it wasn’t an issue with the model itself).
He also told me to get the latest Blender version (which currently is 2.8.2a), and it gives a new UI when exporting.
Using that, it’s working fine now (posing works as it should, meaning the bones have properly fused inside the mesh).
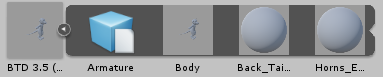
This is normal. 🙂 Armature should always go before Body.
========================
DAY Whatever (it doesn’t matter anymore)
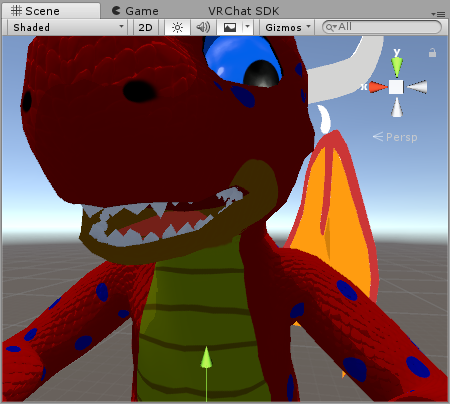
Work on the Beta is going pretty good, and the reason why I’ve been putting the project on hiatus becomes clear. Not only is it the fear of the entire project falling apart (due to something going wrong after removing the fur and adding other stuff), but having to manually add the eyes and wings.
And as expected, the eyes were a pita to set right. The wings however.. surprisingly weren’t when the scaling lined up perfectly.
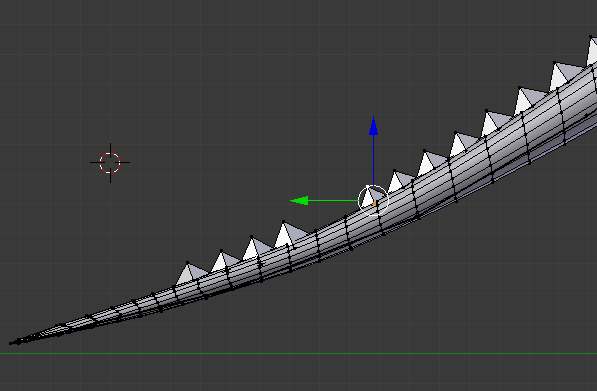
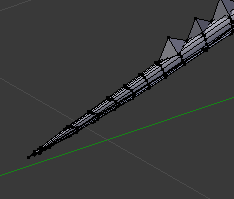
Feel like I may’ve went a bit overboard with the tail spikes. Maybe, I dunno. But I did notice something else; a similar issue I noticed in Blender that didn’t really make itself known until I was moving the hand collider settings over..
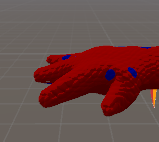
The right hand’s claws are missing. And it’s confirmed in Blender.
First the right foot, now the right hand. Why is this happening…?
And I got my fix (via Wolves). Also spent the time writing down every step, including exporting to fbx using Blender 2.8.2a.
Hmm… the claws have the scale texture?! That won’t do at all!! I’m going to need to redo the old emission and exclude that (plus the chest).
Actually no. As I was fixing dinner, the solution came to me. I have to put the emission as the Detail Mask (it’s the one that controls where the scale shader shows up). And sure enough…
No more scales where I don’t want them! 😀
========================
DAY Almost Ready (yes it is)
Progress continues on Beta. It’s nearing the release state, which is good as I hope to have it ready for use and uploaded before the next Dutchie Meetup. It went through yet another hiatus period (to be with the one I love).
It was literally yesterday when I got back to work on it, but I had reached a snag; a quite big one that was really showing its teeth.
Trying to move the public use idle animation I set up for Jero’s avatar. The pose
worked, but as you can see… an old nemesis showed itself. Except this one wasn’t anywhere as bad as the original. But it did make absolutely no sense of why it was happening! Even having zero keyframes and hitting the Preview button, the jaw pops open.
I had to ask Kaelygon, but also remembering advice he has given to others of a similar issue (yet I wasn’t sure if the issue was truly related to mine). This morning as I was waking up, Kael responded to my help request asking “is the jaw empty in the avatar rig configuration?” Still waking up I could barely understand what he meant by this.
With OJ down my throat and fully awake, my brain made me remember what Kael told others.
…It is related to my issue! Infact it was the issue! But I had to ask “why” is this a thing and if it’s related to the jaw hanging issue I had with the original Dutchie model (after that one VRChat update). He said “vrchat uses it as jaw flap bone even if you have selected visemes in avatar descriptor
and unity by default sets the jaw”
Basically, VRChat ‘made a fucky wucky’ that hasn’t been reverted since my jaw hanging issue started. Anyway, unsetting the jaw fixed the issue. Now work can continue with setting up the visemes and dynamic bones.